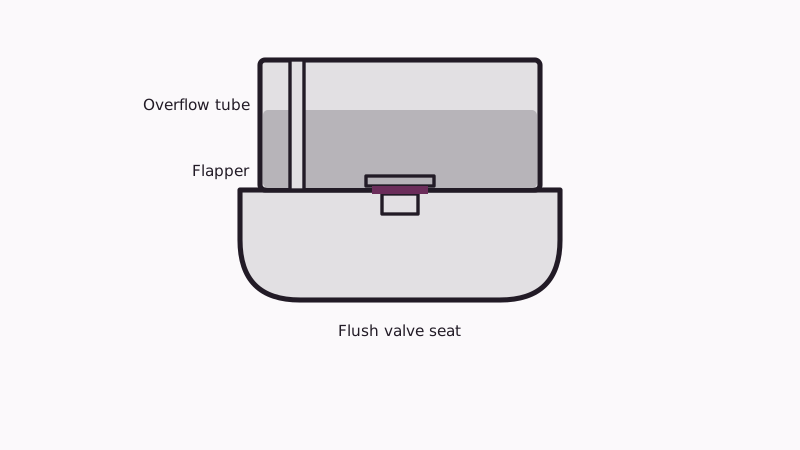
Quick answer: you cannot swap the entire flush valve on a standard two-piece toilet without unbolting the tank, because the large locknut securing the valve lives beneath the tank. What you can do is repair the seat the flapper closes against, using an overlay kit that fits on top of the old valve. Most seat leaks respond to that. Other toilet faults are sorted out under toilet repairs.
What exactly is the flush valve?
Think of it as the big plug-hole in the tank floor. Press the handle, the rubber flapper rises, tank water pours in, and the flapper settles back on the valve seat to hold the next fill. The valve body pokes down through the floor of the tank and is locked in place from underneath.
When the seat is rough, pitted or crusted, the flapper cannot seal and water seeps into the bowl all day. The tank tops up in brief bursts, the fill valve hisses now and then, and the bill rises, even though nothing looks broken.
Is it really possible to repair a flush valve without taking the tank off?
For a worn seat, yes. Fluidmaster and Korky both sell a 2 inch flush valve repair kit that fits over the existing seat without tank removal. Fluidmaster's has a sealant ring that you peel and press onto the old seat, plus a flapper. Korky's pairs a flapper, a replacement plastic seat and silicone sealant.
Both suit a valve with a 2 inch opening. Neither replaces a cracked or broken valve body, and neither can stop a leak around the tank bolts or the gasket where tank meets bowl. Those jobs mean taking the tank off.
Seat or flapper: which one is leaking?
Run the cheap test first, which EPA describes: add food dye to the tank and wait. Color reaching the bowl even after a brand new flapper goes in puts the suspicion on the seat. With the tank drained, trace the seat with a finger. Roughness, pits or a mineral crust mean it is worn.
Our guide to replacing the flapper covers the first step, and flapper valve types shows which shapes fit which toilets.
How is an overlay kit fitted?
Close the supply valve, flush, and dry the tank floor around the valve well, since sealant needs a clean dry surface. Remove the old flapper, clean the seat of scale, and follow the kit instructions to fit the new ring or seat. Then fit the flapper and let the sealant set for the time the maker states before refilling.
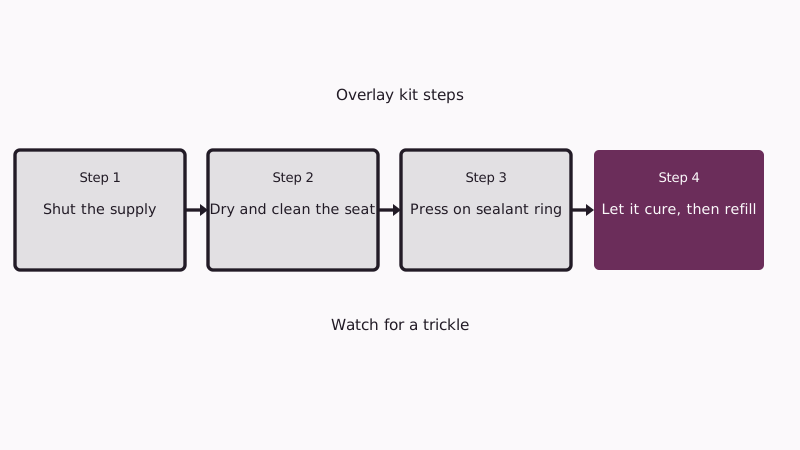
Do not rush the curing time, since water that touches wet sealant will undo the repair. Read the packaging for the cure time of your kit, because the two brands differ. Refill slowly and watch for a trickle at the seat.
When does the tank really have to come off?
A cracked valve body, a weeping nut or gasket beneath the tank, water shows at the tank bolts, or you want a different valve such as a 3 inch drain, all mean lifting the tank. The old parts then come out and new ones go in with a fresh gasket.
Lifting a tank is a two-hand job. Porcelain is heavy and brittle, and the bolts are often corroded in older bathrooms. In older Anaheim, Fullerton and Orange bathrooms, corroded bolts are the usual obstacle. A plumber can free them without cracking the porcelain.
Is a one-piece or wall-mounted toilet different?
Yes. One-piece toilets and models with concealed tanks have their own parts, and the usual universal kit may not fit. Check the maker's repair part for your model, and never force a part into an unusual valve. A kit that fits a standard 2 inch valve is not for every design.
Not sure which type you own? Look inside the tank for a 2 inch round opening with a rubber flapper on pegs. A different shape, an integrated canister or a pressure-assisted tank is not a candidate for an overlay kit, and that is the moment to ask a plumber.
What does it cost, and is a repair worth it on an old toilet?
An overlay kit is a small purchase, and a plumber's visit is mostly labor. We do not publish a price here, as it depends on the toilet and the other work found. On a very old or cracked toilet, replacement can beat repair.
Weigh the alternatives against what a new toilet costs installed. For leaks from the tank bolts, read leaking toilet tank repair, and if the fill valve keeps cycling, see repairing a toilet fill valve. To have someone look at it, use the quote form or start at the Citrus Belt homepage.
Common questions
Is a full valve swap possible while the tank stays bolted down?
Not completely. The full valve is held by a locknut under the tank, so a full replacement means unbolting it. What can be done in place is repairing the seat with an overlay kit. A plumber will tell you which fits your toilet and whether the seat or the whole valve is at fault.
Is the overlay repair permanent?
It can last for years, since it renews the sealing surface. Results depend on how clean and dry the seat was when the kit went on, and on the water quality. Mineral deposits will build again over time. If the valve body is damaged, the kit will not hold, and a full replacement is the answer.
Do I need special tools?
Usually none. A sponge, a cloth and a scouring pad cover the preparation, and the kits come with everything else. For a full replacement you also need a wrench or pliers for the locknut, a bucket and new gaskets, and a helper to lift the tank.
What if the toilet still runs afterward?
Look at the chain slack, the waterline and the fill valve in turn. A fill valve that fails to shut off, or a waterline above the overflow tube, keeps a toilet running even when the seat is perfect. See the overflow tube repair notes for the level adjustment.
Sources
Last updated