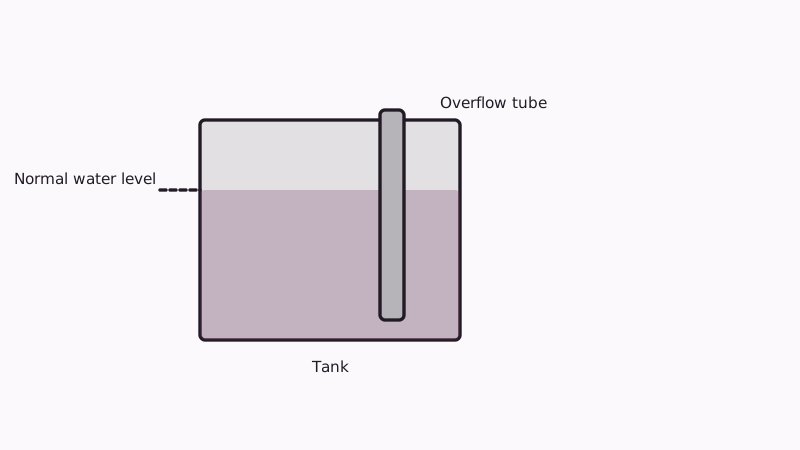
People blame the overflow tube for two separate problems. In one, the tube is fine and the tank is simply filling too far, so water trickles down it nonstop. In the other, the tube itself has split or worked loose. Telling them apart takes a flashlight and about five minutes. Broader toilet trouble, from clogs to cracked bowls, is covered by our toilet repair plumber page.
What is that open pipe in the tank for?
Think of it as an emergency drain. Should the fill valve jam open, rising water finds the top of the pipe and pours into the bowl rather than over the tank rim and onto the floor. Under normal conditions the surface stops short of the rim of the pipe, and nothing goes down it.
Current designs usually cast the pipe as one piece with the flush valve, the fitting that also carries the flapper. A slim refill hose runs over from the fill valve and clips to its rim, which keeps the bowl replenished once a flush ends. That hose should point into the pipe and no further; pushed deep inside, it can pull tank water down by siphon action.
Why does water keep spilling into the tube?
Three culprits explain nearly every case: the float is set too high, the fill valve will not close off, or the fill valve has been mounted too low. Fluidmaster's literature targets a resting surface near 0.5 inch down from the top edge of the pipe. Anything higher spills in and runs constantly.
Work through these in order:
- Level. Turn the adjuster on the fill valve a little, flush, wait for the refill, and note where it stops.
- Refill hose. If it is jammed down inside the pipe, draw it back to the rim.
- Valve condition. Water that never stops, whatever the setting, points to a worn or grit-clogged valve. Swapping it is shown in replacing a toilet fill valve.
Not sure whether the loss is at the flapper instead? The EPA's dye test settles it. Stir a little food dye into the tank water and leave the handle alone. If any dye appears in the bowl once ten minutes pass, the flapper is leaking, which is the subject of toilet flapper repair.
Is the tube itself split or loose?
Dry the pipe with a cloth, let the tank fill, then run a flashlight down its side and around the foot where it joins the tank floor. Beads of water or a dark hairline mean a crack. Above the waterline a split stays dry until the level reaches it, while one below it leaks all the time. A pipe that wobbles in your hand has lost its seal.
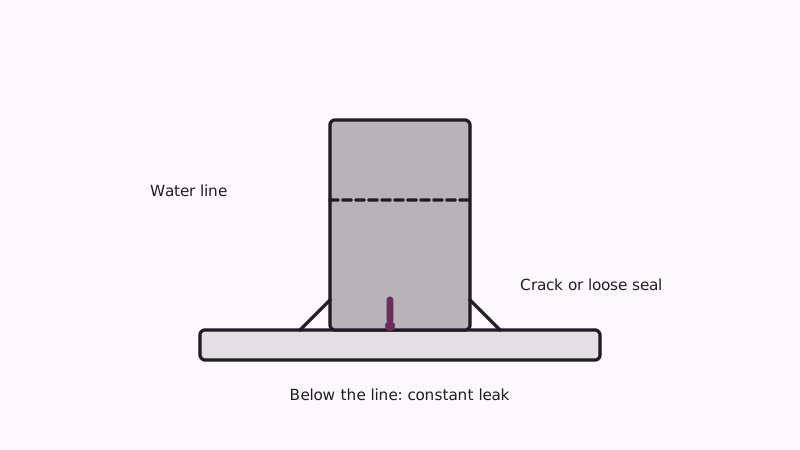
Puddles around the base after a flush do not always blame the pipe. A tired gasket at the point where the flush valve exits the tank behaves the same way, even with snug tank bolts. Sorting out those cases is the subject of fixing a leaking toilet tank. Resist the urge to lean on the pipe, because aged plastic turns brittle and snaps under pressure.
Is a repair possible, or is it a full flush valve swap?
In nearly all cases the cracked pipe is not patched; the flush valve assembly, or a combined flush valve and flapper kit, is replaced. That job means closing the supply, draining the tank, lifting it off the bowl, changing the part and setting the tank back on fresh gaskets. A few kits skip the tank removal.
A shortcut of that kind appears in a flush valve swap that leaves the tank in place. It works for some toilet designs and not others, so the kit must match the model.
The full swap, in brief:
- Close the stop, flush, and mop up the last of the water.
- Detach the supply hose, then back out the nuts beneath the tank.
- Lift the tank onto a towel and loosen the large nut that holds the flush valve.
- Fit the replacement valve with its gasket, lower the tank onto a new seal, and tighten the bolts a half turn at a time, alternating sides.
- Reconnect, refill and set the level before the first real flush.
Porcelain cracks under lopsided clamping, so take it slowly. A seized bolt or a cracked tank means it is time to stop and hand the job over.
It still runs after the repair. Now what?
Recheck the chain, the level setting and the flapper seat. A chain with no slack holds the flapper off its seat, and one with too much can tangle. Repeat the dye test an hour later. If water is still escaping, the flapper or fill valve is guilty, and the guide to stopping a running toilet covers both.
Scale is a local factor. The City of Anaheim's hardness page lists about 300 ppm, and mineral crust on a flapper seat is common in older tanks. A gentle scrub with a nonabrasive pad often restores the seal.
At what point does a new toilet make more sense?
A split tank or bowl, an aging fixture that weeps from several joints, or repair costs that approach what a new unit sells for all argue for replacement. Typical prices for a swap are in the toilet replacement cost guide, and the quote form is open once you want someone to take a look.
Common questions
Is any flow into the tube expected?
Just the thin trickle from the refill hose right after a flush, which is intended. Water that pours over the rim means the setting is too high or the valve is giving out, and the bowl quietly carries off water you pay for.
Where should the tank water settle?
Per Fluidmaster, roughly half an inch lower than the top of the pipe, while the critical level marking on the valve body sits at least an inch higher than the pipe's top. Other makers differ, so check the sheet that came with your valve.
Is it possible to swap just the pipe?
On many toilets the pipe and flush valve are one casting, so the entire part goes. A few clamp-on kits exist for particular designs. What matters is pairing the part with your toilet by make and model, something a plumber can usually identify at a glance.
What will a repair bill look like?
The toilet and the part drive the price. A flush valve swap is a longer visit than a fill valve adjustment, and the quote should split labor from parts. Figures for neighboring jobs appear in the replacement cost guide linked earlier on this page.
The rest of our guides start from plumber in Anaheim.
Sources
Last updated